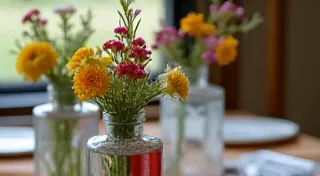
DIY Mason Jar Vases: Rustic Charm for Any Room
Transform those humble mason jars into charming and rustic vases with this simple DIY project! Perfect for beginners and anyone looking to add a touch of handmade beauty to their home decor. These vases are incredibly versatile – use them to display wildflowers, elegant roses, or even just a few sprigs of greenery. It's a budget-friendly way to refresh any room.
What You'll Need
- Mason Jars (any size or shape will work)
- Paint (acrylic, chalk paint, or spray paint – choose your favorite finish)
- Paintbrushes or Sponges (for applying the paint)
- Twine, Ribbon, or Lace (optional, for added decoration)
- Hot Glue Gun (optional, for attaching twine/ribbon)
- Sandpaper (optional, for a distressed look)
Step-by-Step Instructions
Step 1: Prepare the Jars
Clean your mason jars thoroughly with soap and water. Make sure they are completely dry before you begin painting. If you want a truly rustic look, lightly sand the outside of the jars to create a slightly textured surface for the paint to adhere to. This is especially helpful if you're using a glossy jar.
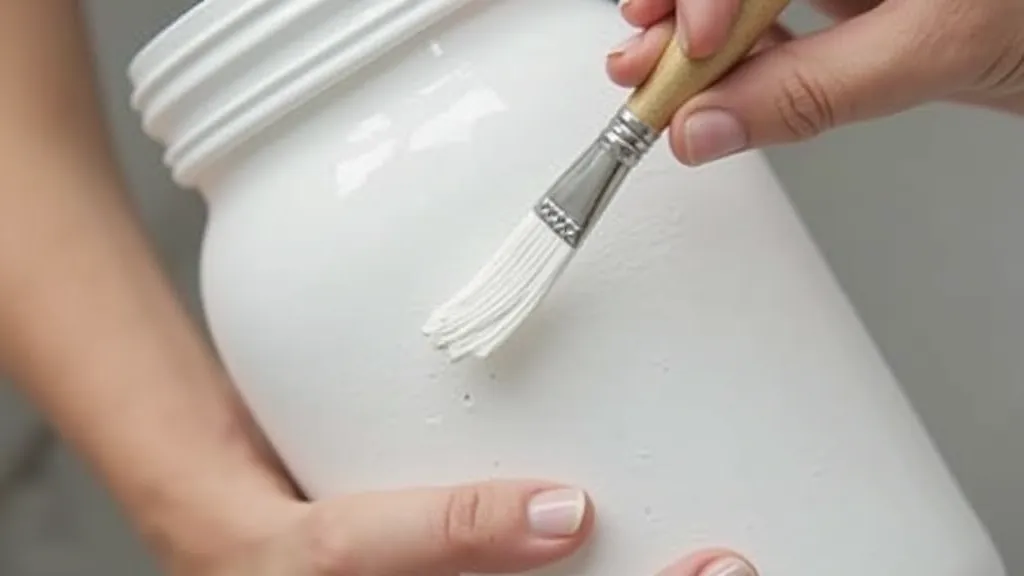
Step 2: Paint the Jars
Apply your chosen paint to the mason jars. If using acrylic or chalk paint, you’re likely to need two or three coats for full coverage. Allow each coat to dry completely before applying the next. For a more distressed look, consider dry-brushing or stippling the paint on.
Step 3: (Optional) Add Decorative Elements
Once the paint is dry, you can get creative! Wrap twine, ribbon, or lace around the jar and secure it with a hot glue gun. You can also add buttons, beads, or other embellishments. Get creative and personalize your vases to match your home’s style.
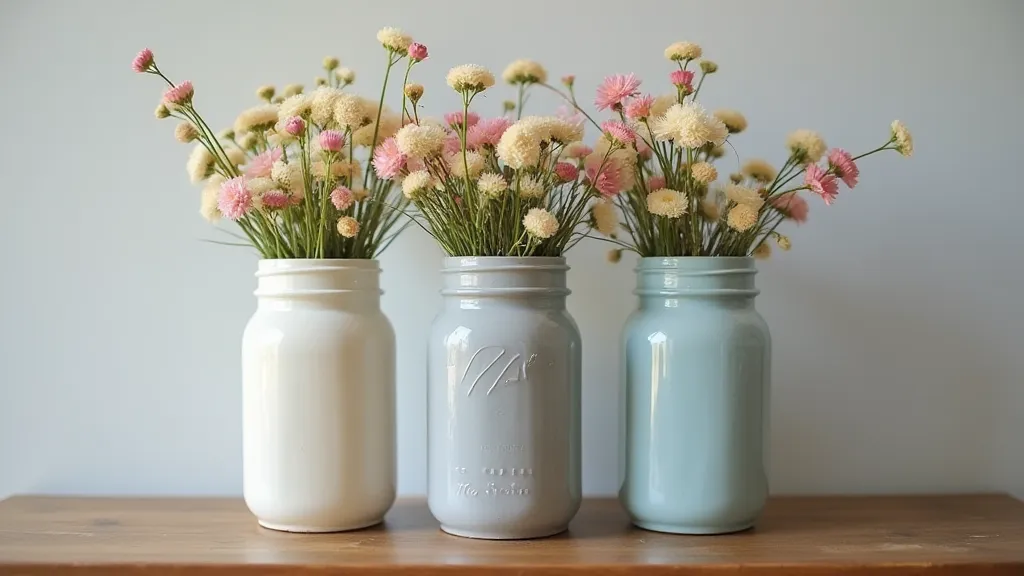
Step 4: Let Them Dry and Display!
Allow your finished mason jar vases to dry completely before filling them with water and your favorite flowers. Place them on a windowsill, coffee table, or mantelpiece to add a touch of rustic charm to any room.
Tips & Variations
- Distressed Look: After painting, lightly sand the edges of the jar to reveal the original glass.
- Ombre Effect: Create a gradual color transition by applying different shades of paint.
- Painted Patterns: Use stencils or freehand painting to create unique designs.
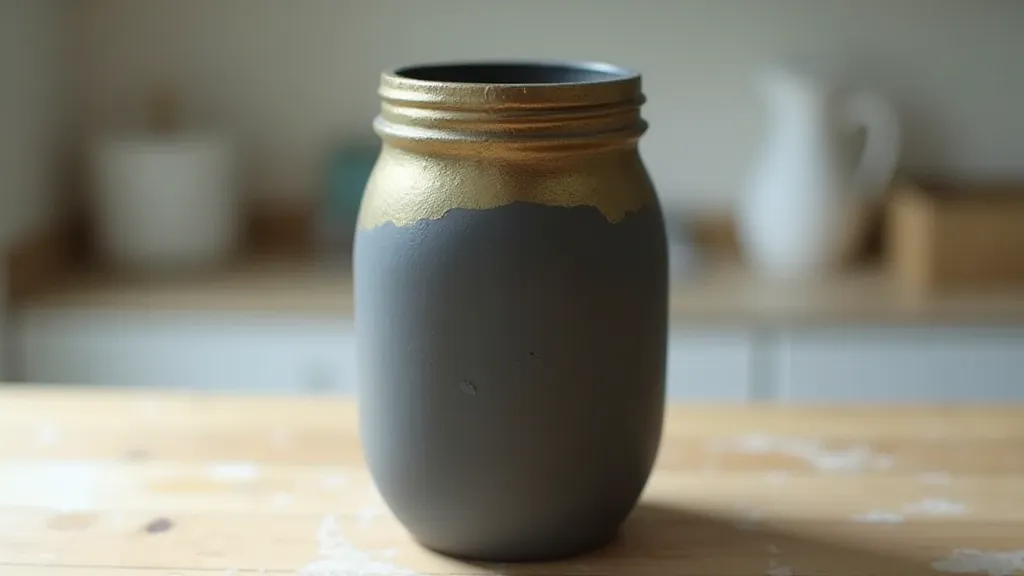
- Metallic Accents: Add a touch of glamor with metallic paint or gold leaf.
Enjoy Your Handmade Decor!
These DIY mason jar vases are a simple and satisfying project that adds a personal touch to your home. They make beautiful handmade gifts too! So gather your supplies and get crafting!